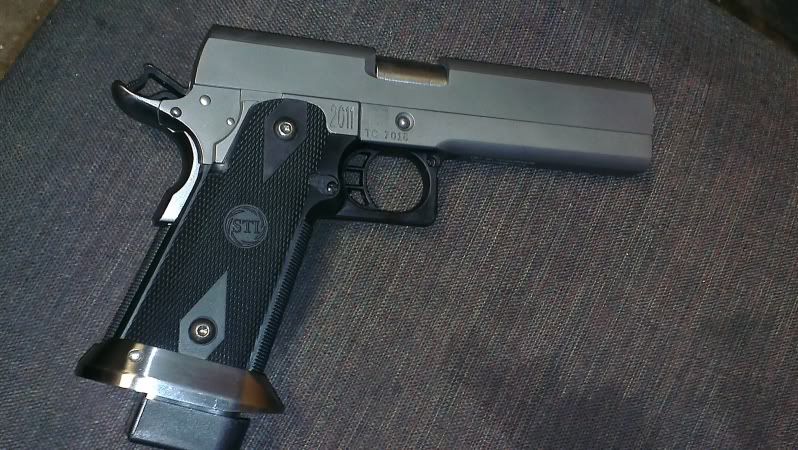
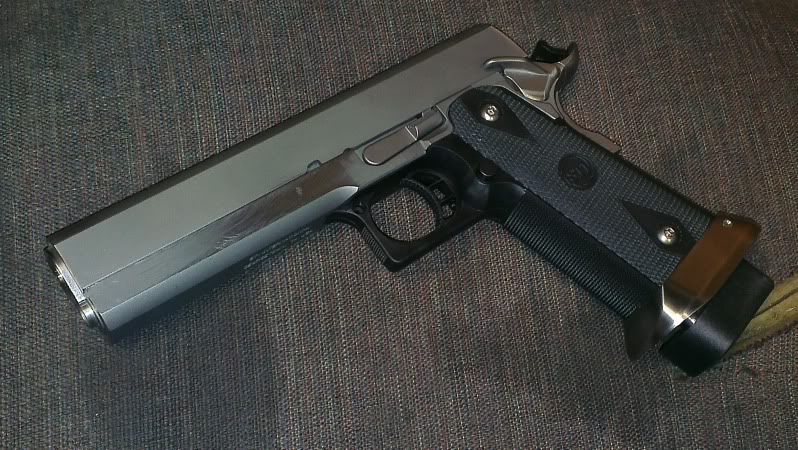
First 2011 build

Discussion of handguns

First 2011 build

Postby FJ540 on Tue Jun 11, 2013 6:54 am

After a lot of sanding, grinding, sanding, grinding, liquor, grinding, and sanding...

This:

Image

Has turned into:

Image

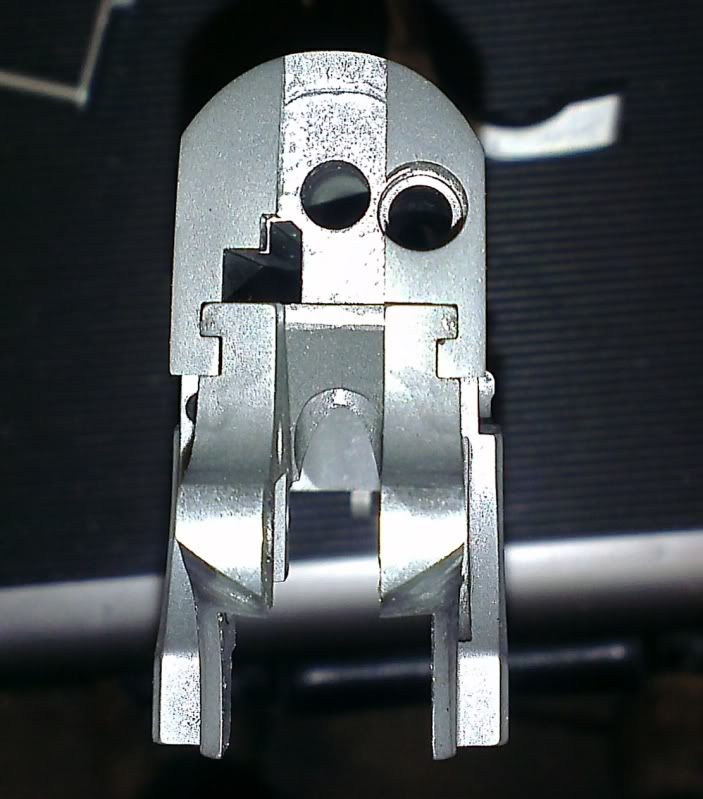
I still have more profiling to do on the beavertail and thumb safeties, but they're functional.

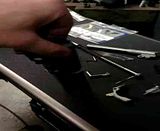
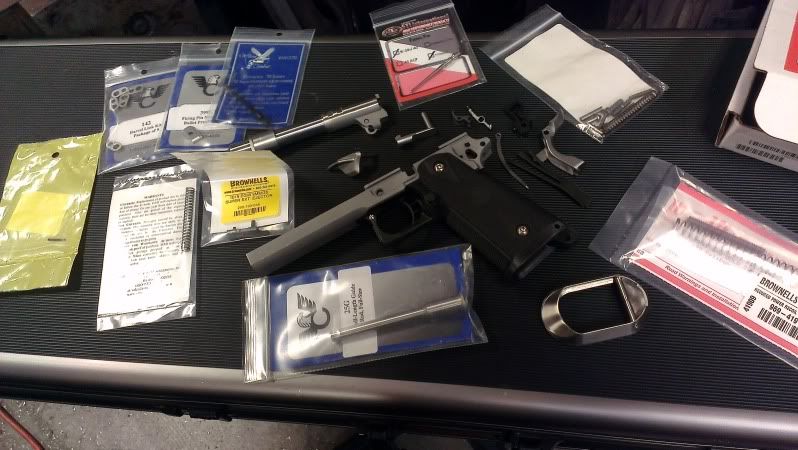
Slide and mags show up today, so my use of abrasives has only just begun. :lol:

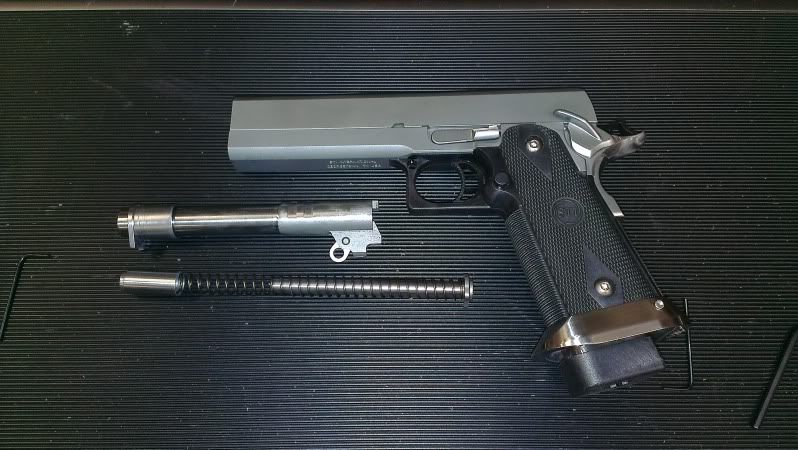
Once I get the frame/slide fit, then I'll take it to the mill and fit the barrel. I ordered a non-ramped frame just so I could get the pleasure of fitting the barrel to it. I realize that's kind of ironic since I ordered a drop-in barrel, but I didn't see any gunsmith fit barrels that didn't also need the chamber finish reamed, which means gages and reamers and all that business. The nowlin's have a good rep for fitting, and it's a great snap fit into the Mrs.' Springer (the lockup would actually be excellent if her slide/frame fit was tighter). Hopefully the STI slide will prove to be as good of combination.

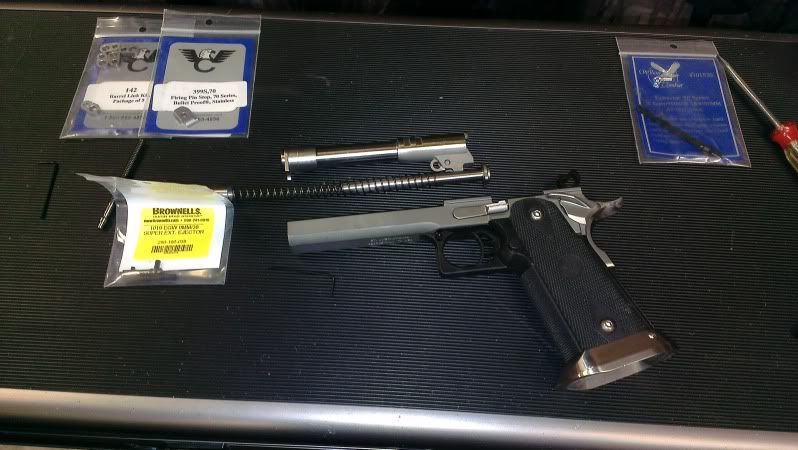
The mix of infinity and STI trigger components is awesome. I'm not sure just how obscenely light the trigger is, but it's niiiiiice. :mrgreen: If I had to guess I'd say it's in the <3# range. Oldman's contender is lighter, but these are out of the box assembled components with zero break-in. I may end up bumping it up a little too. The only tuning I've done so far is getting the sear spring tweaked into position so it will actually stay on the sear. As it came, that leg was barely touching the sear and it would slip off after one pull.

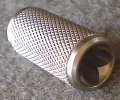
The Wilson full length guide rod is a bit of a disappointment. The surface of it was rough enough to require polishing in the lathe with steel wool before I even bothered trying the spring on it. I still need to clean up the plug ID, because as delivered the plug is rough enough to scratch the now polished rod.

The extended mag well was another surprise. I wasn't overly thrilled that I had to re-contour the bottom of the grip just to get the thing on. I suppose with the amount of people who just sand them smooth and grip tape them, they don't really care if it takes some sanding to get it on, but it became a no turning back proposition just to try it out. At least I like it. :D Then there was the sanding the inside of the grip to make the bevels match, but I kind of figured that'd be part of the deal. I'm guessing I can flame polish the plastic to make it look pretty once I'm done removing material?

So far I'm quite pleased with my decision to pursue this project. I love how the grip fits my hand. I still haven't decided on sights to use either.
User avatar
FJ540
 
Posts: 6834 [View]
Joined: Fri Nov 20, 2009 5:44 pm
Location: Rock Ridge

Re: First 2011 build

Postby Cuda66 on Tue Jun 11, 2013 6:55 am

Needs more liquor.

(Nah. Looking' good...)
User avatar
Cuda66
 
Posts: 372 [View]
Joined: Mon Jun 14, 2010 9:10 am
Location: Willmar

Re: First 2011 build

Postby FJ540 on Tue Jun 11, 2013 7:06 am

I need to replace the switch on my buffer/flap wheel grinder, and then I'll do a nice surface finish on the safety and frame. I haven't blended the top of the frame to the beavertail at all yet, so there's a lump where the two intersect on the top. I figured that can wait until I'm ready to contour the back of the slide to the frame anyway - and just do it all at once.
User avatar
FJ540
 
Posts: 6834 [View]
Joined: Fri Nov 20, 2009 5:44 pm
Location: Rock Ridge

Re: First 2011 build

Postby Ron Burgundy on Tue Jun 11, 2013 7:27 am

Nice!

I have zero of the tools or skillz needed to build a 2011 so I'll have to buy one when the time comes. In the mean time, please, please keep posting build pics.
User avatar
Ron Burgundy
 
Posts: 981 [View]
Joined: Wed Mar 16, 2011 7:28 pm

Re: First 2011 build

Postby CarRacer on Tue Jun 11, 2013 7:51 am

That is a cool project for sure. Glad it's progressing how you want it to.
User avatar
CarRacer
 
Posts: 744 [View]
Joined: Sat Oct 22, 2011 11:21 pm
Location: Shakopee, MN

Re: First 2011 build

Postby FJ540 on Tue Jun 11, 2013 8:10 am

Getting the beavertail to fit the frame radius was quite a task. EGW makes these oversize in every direction so you can blend it to your frame. That .005" off the ears was a long slow process. Then the thumb safety was fighting me (it locked itself in twice), but fortunately since the grip comes off, that wasn't as monumental of issue as it would've been in a regular steel frame. Being paranoid about removing too much always seems to cause me grief in the other direction with those.
User avatar
FJ540
 
Posts: 6834 [View]
Joined: Fri Nov 20, 2009 5:44 pm
Location: Rock Ridge

Re: First 2011 build

Postby FJ540 on Tue Jun 11, 2013 7:35 pm

The frame and slide are assembled. I went old school and did it with files and stones instead of my surface grinder like I had planned - still only took about an hour and a half.

Click this one to play:
Image


I'm pretty pleased with the fit for my first one.
Image
User avatar
FJ540
 
Posts: 6834 [View]
Joined: Fri Nov 20, 2009 5:44 pm
Location: Rock Ridge

Re: First 2011 build

Postby FJ540 on Wed Jun 12, 2013 5:53 am

Image

I have the first (easy) cut done for the ramped barrel, but need to make an adapter to do the second part of it. I didn't buy the special cutter.
User avatar
FJ540
 
Posts: 6834 [View]
Joined: Fri Nov 20, 2009 5:44 pm
Location: Rock Ridge

Re: First 2011 build

Postby FJ540 on Tue Jun 18, 2013 6:08 am

After lots and lots of fitting - just needs sights and slide serrations.

Image

Image

Ended up with some scratches on the left side when I milled the frame for the nowlin ramp, and I'll need to tig in the craters to take those out, but otherwise it's ready for the final cuts and then bead blasting and finish.
User avatar
FJ540
 
Posts: 6834 [View]
Joined: Fri Nov 20, 2009 5:44 pm
Location: Rock Ridge

Re: First 2011 build

Postby plblark on Tue Jun 18, 2013 8:58 am

That slab side look is beautiful. minimal serrations? Is it shootable?
private or small grou permit classes available
"I'll take a huge order of fiscal responsibility, a side of small government, hold the religion please. " Paraphrase from Tamara K
RIP 1911Fan
User avatar
plblark
 
Posts: 6794 [View]
Joined: Thu Jul 26, 2007 12:12 pm
Location: Roseville

Re: First 2011 build

Postby FJ540 on Tue Jun 18, 2013 9:32 am

I know... I don't want to cut it up any further, but it's hard to get a grip on like it is. :lol:

It's fully assembled (more so than when I took the pics), and has popped off 3 primers so far checking firing pin height and strike force. I'm using a 19# main spring instead of the 15# I'd ordered (19 came with the ed brown rebuild kit), since the 15# wasn't working at all with the light weight hammer/strut/firing pin. I guess you need the steel firing pin if using the light weight hammer parts (according to the interwebs), or it could just be that it needs some more breaking in before that combo will work. I'm getting a solid hit with the 19# and it's still plenty smooth cycling, so I'm not disappointed at all.

Yes, this will be coming with tonight. :mrgreen:
User avatar
FJ540
 
Posts: 6834 [View]
Joined: Fri Nov 20, 2009 5:44 pm
Location: Rock Ridge

Re: First 2011 build

Postby sawgrass on Tue Jun 18, 2013 9:41 am

That looks great!
I can't make it tonight. Maybe we can meet at OGC one day during the week and have a 1911 shoot.
I don't have any factory ammo but have plenty of reloads.
NRA Life Member
GOCRA Member
sawgrass
 
Posts: 821 [View]
Joined: Mon Feb 23, 2009 9:36 pm

Re: First 2011 build

Postby plblark on Tue Jun 18, 2013 10:48 am

Yeah, too bad you have to add something there to make it functional. The other problem is the more custom you make it the more difficult to sell later if you have to.

A Stylized Monogram on each side?
private or small grou permit classes available
"I'll take a huge order of fiscal responsibility, a side of small government, hold the religion please. " Paraphrase from Tamara K
RIP 1911Fan
User avatar
plblark
 
Posts: 6794 [View]
Joined: Thu Jul 26, 2007 12:12 pm
Location: Roseville

Re: First 2011 build

Postby FJ540 on Tue Jun 18, 2013 11:03 am

I've been toying with some shallow tiger stripes on the very end of the slide. Maybe starting in the middle of where the serrations usually start.

I have no intention of selling this critter. I'm not building it as an investment, I'm building it for the experience.

Rhonda, it's 9mm. I don't have any factory ammo either, but I have around 700 rds of 9mm here, and another 300 up north. :lol:
User avatar
FJ540
 
Posts: 6834 [View]
Joined: Fri Nov 20, 2009 5:44 pm
Location: Rock Ridge

Re: First 2011 build

Postby FJ540 on Fri Jun 21, 2013 2:39 pm

Just found out the heat treat temps for the 4140 frame/slide are below the temps needed for PVD coatings, and salt bath nitriding would also jeopardize the temper and could lead to cracking along the rails because of their geometry. :(

So now I'm torn between hard nickel and just Parkerizing it.
User avatar
FJ540
 
Posts: 6834 [View]
Joined: Fri Nov 20, 2009 5:44 pm
Location: Rock Ridge

Next

Return to Handguns

Who is online

Users browsing this forum: No registered users and 6 guests

cron